
Fills and hatches
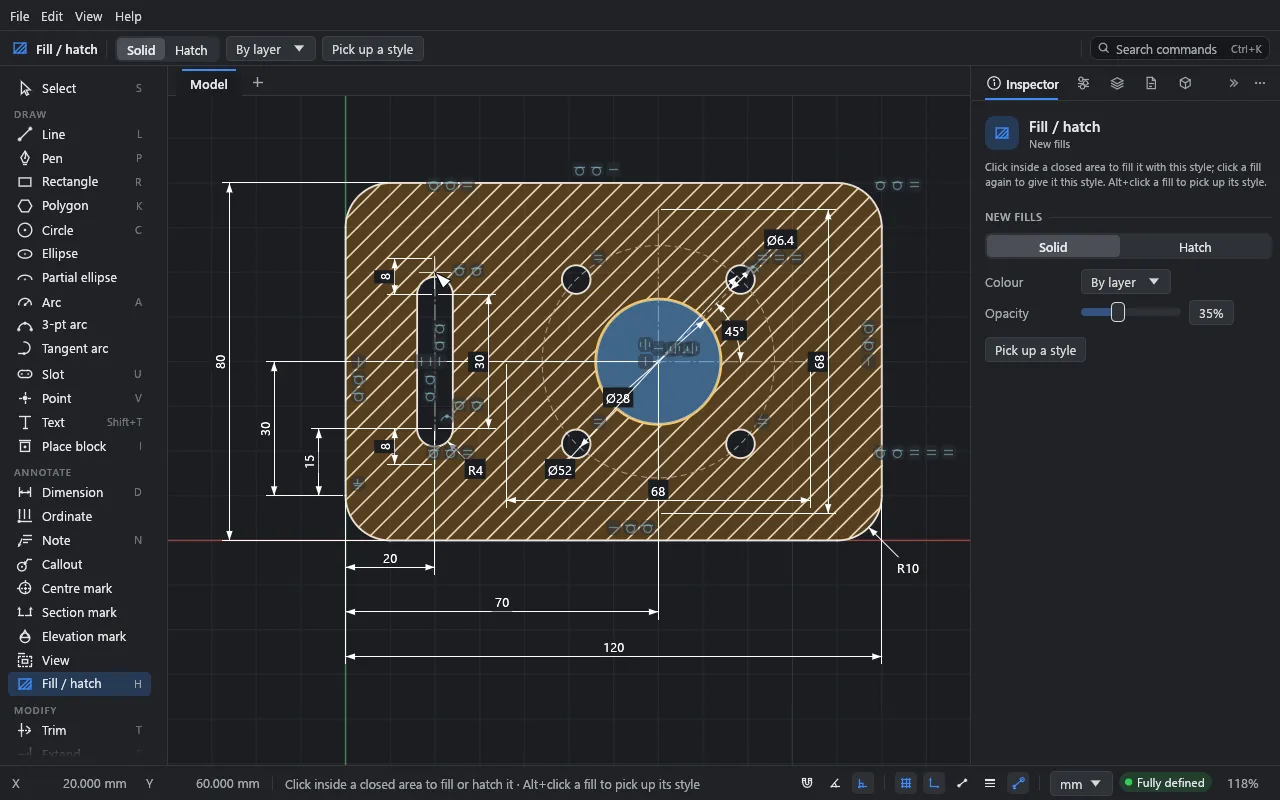
What you’ll make: the example plate, hatched, with its bore filled solid. Then you’ll copy a style with the eyedropper and set a hatch’s origin and angle on the canvas.
Time: about 10 minutes.
How fills work
A fill or hatch fills a closed area: a region bounded by solid curves. Holes inside it (islands) are left out. Fills are associative: when the geometry changes, the fill follows. If its boundary breaks (a curve deleted, or a gap opened), the fill keeps its last shape and the Inspector offers Re-pick boundary.
Construction geometry doesn’t close areas. Neither, if you turn on Edit → Preferences… → Drawing aids → Find closed areas on each layer separately, do curves on other layers.
1. Choose the style first
- Open the example (File → Open example).
- Press H for the Fill / hatch tool.
- In the top bar (or the Inspector, under New fills), choose Hatch. Leave the pattern as it is.
The tool’s settings are the style of the next fill, whatever is picked.
2. Fill
- Move the pointer over the plate, between the holes. The area that will be filled is highlighted.
- Click. The plate is hatched; the bore, the slot and the bolt holes stay open.
- In the top bar, choose Solid.
- Click inside the bore. It’s filled solid.
A fill you’ve just made stays picked. Clicking a fill again with the tool gives it the current style.
3. Copy a style with the eyedropper
Hold Alt and click a fill or hatch with the Fill / hatch tool. Its style becomes the style for new fills. Or click Pick up a style and then click the fill; Esc leaves the eyedropper. It works on the fills inside block copies too.
4. Edit a fill
Pick a fill with the Select tool by clicking inside it. The Inspector shows:
- Style: Solid or Hatch. For a solid fill: Colour and Opacity. For a hatch: Pattern, Scale, Angle, Size (Drafting or Model), the Lines colour and Weight, and a Background colour.
- Layer, and Bring to front / Send to back for the order among fills on that layer. Fills on a higher layer draw over those on lower ones (drag layers to reorder them in the Layers panel). Fills always draw beneath curves.
- Area, Perimeter and Centroid.
Drafting patterns keep the same size on paper whatever the sheet’s scale. Model patterns have a real size (brick courses, block joints) and scale with the drawing, as in Revit.
5. Set a hatch’s origin and angle on the canvas
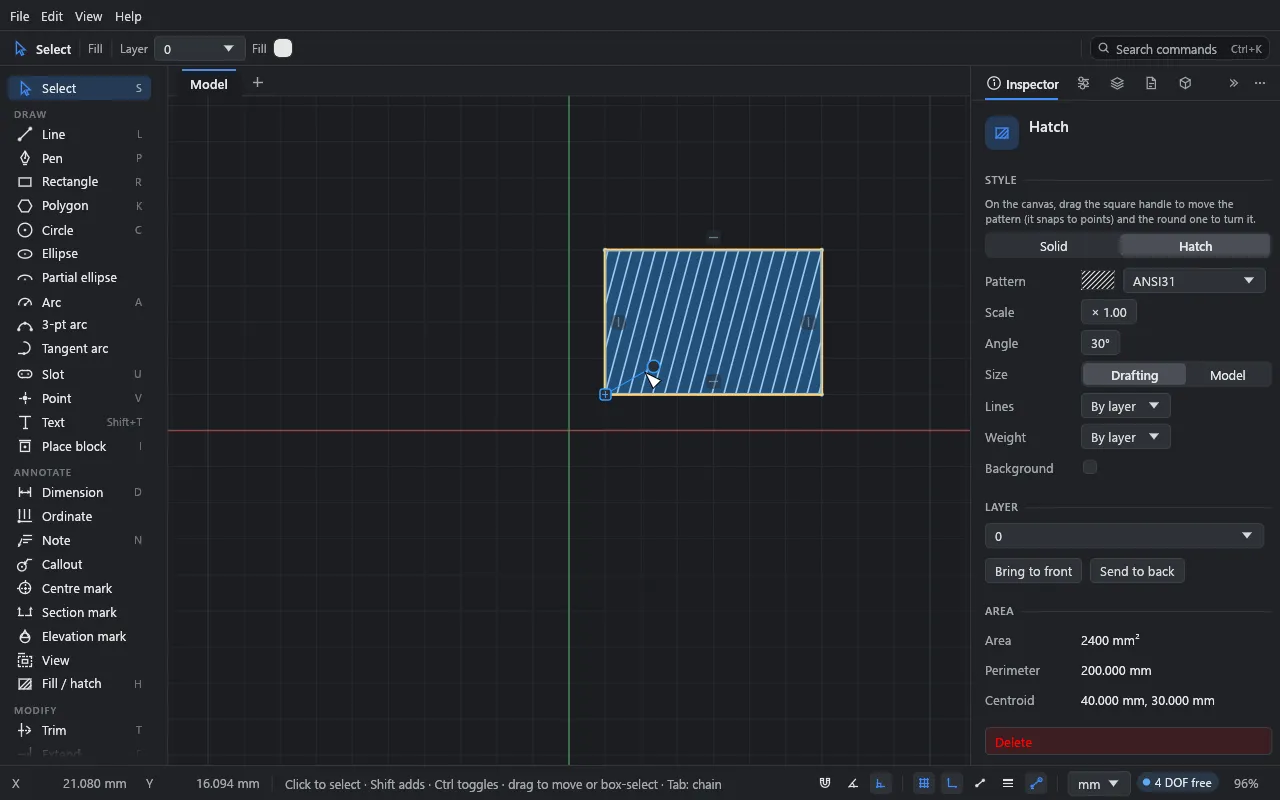
A picked hatch has two handles:
- The square handle is the pattern’s origin. Drag it to move the pattern; it snaps to points, so you can start the pattern exactly on a corner.
- The round handle turns the pattern, in 15° steps.
Each drag is one undo step.
Patterns
The built-in patterns are ANSI31 to ANSI38, STEEL, CONCRETE, EARTH, INSULATION, GLASS, WOOD, GRID, DOTS and SAND, plus BRICK and BLOCK as model patterns. The pattern menu shows a swatch of each.
To use your own AutoCAD or Revit patterns, go to Parameters → Hatch patterns → Import .pat…. Imported patterns are stored in the drawing, so they travel with the file.
A fill belongs to the curves around it: move or reshape them and it follows. A line drawn across a fill doesn’t cut it; the fill keeps its whole area until its own outline changes.
Hatches are clipped exactly to their boundary and stay crisp at any zoom. A hatch too dense to see at the current zoom is drawn as a tint.
Fill colours and layers
A fill takes its colour from its layer unless you give it one. Each layer has a stroke colour and a separate fill colour (Same as stroke by default); set them in the Layers panel or with the top bar’s Fill swatch.
What you learned
- H fills or hatches a closed area; set the style before you click.
- Alt+click picks up a fill’s style.
- A picked hatch’s square handle moves its origin; the round one turns it.
- Drafting patterns are sized on paper, model patterns in the world.