
Editing
What you’ll do: work on the example plate and a rectangle of your own: pick things in different ways, move and turn them with typed values, scale with handles, and reshape corners and outlines with the modify tools.
Time: about 20 minutes. Each section stands alone.
Open the example (File → Open example) to follow along. It’s an unsaved copy, so you can’t harm it.
Select
With the Select tool (S, or Esc from any tool):
| To | Do this |
|---|---|
| Pick one thing | Click it. |
| Add to the selection | Shift+click. |
| Toggle in or out | Ctrl+click. |
| Pick everything inside a box | Drag from left to right (a window selection). |
| Pick everything the box touches | Drag from right to left (a crossing selection). |
| Pick a line’s midpoint | Click near the middle of the line. |
| Pick everything | Ctrl+A. |
| Clear the selection | Esc, or click empty canvas. |
Clicking inside a fill or hatch picks it. Clicking inside an empty outline picks nothing, so a box selection can start there. (To pick a closed area and measure it instead, turn off Edit → Preferences… → Drawing aids → Pick an area only where it is filled or hatched. A picked area shows its area, perimeter and centroid in the Inspector.)
Pick filter: All, Edges, Points
With nothing picked, the top bar shows All, Edges and Points. Edges picks only curves and Points only points, for clicks, boxes and hover. A points-only box takes every point inside it. Fills, text, blocks and areas are picked only with All. Dimensions and notes are picked as usual whatever the filter.
Chains with Tab
Hover over a curve and press Tab. The whole chain it belongs to (curves joined end to end) is highlighted, as in Revit. Click to pick the chain; Shift+click adds it, Ctrl+click takes it away. Press Tab again to go back to the single curve.
With nothing under the pointer, Tab widens the current selection to whole chains.
Move with G
The plate is fully defined, so its geometry can’t move. Draw something free to move: press R and click two corners beside the plate, then press Esc.
- Drag a box round the new rectangle, from left to right, to pick its four sides.
- Press G. The rectangle follows the pointer.
- Press X to lock the move to the X axis (Y for the Y axis).
- Type
10and press Enter. The rectangle moves exactly 10 mm.
Without an axis lock, type the X offset, Tab, then the Y offset. Press B to choose a different base point first: click a point (it snaps), then move. Click or Enter places; Esc or a right-click cancels. Snapped and typed moves land exactly.
Moving a picked area or hatch
A picked hatch (or area) moves with its outline: press G, or drag inside it. Lines that aren’t part of it but share a corner with it, like a wall running on past a room, behave according to Auto relations:
- On: the joins hold, so those lines stretch to follow.
- Off: the outline lets go of them. They stay where they are and the join is split. One Ctrl+Z puts it back, joined.
Picked lines moved on their own always stretch the lines joined to them.
Other ways to move:
- Drag picked geometry. Drop an end point on another point to join them.
- Arrow keys nudge the selection one grid step; Shift+arrow, ten.
- Inspector fields: type a new Start, End, Center or Position. The geometry moves as far as its relations let it.
Duplicate, copy and paste
- Shift+D duplicates the selection in place and starts moving the copy, as in Blender.
- Ctrl+C, Ctrl+X and Ctrl+V copy, cut and paste. Paste lands under the pointer and goes straight into a move. Ctrl+Shift+V pastes in place. Copies keep their relations and dimensions, and the clipboard works between Drift windows.
Rotate with R
- Pick the rectangle you moved.
- Press R. The guide shows the pivot (the middle of the selection), where you started and the angle so far.
- Move the pointer round. Multiples of 15° stick as you pass them.
- Type
30and press Enter for an exact turn, or click.
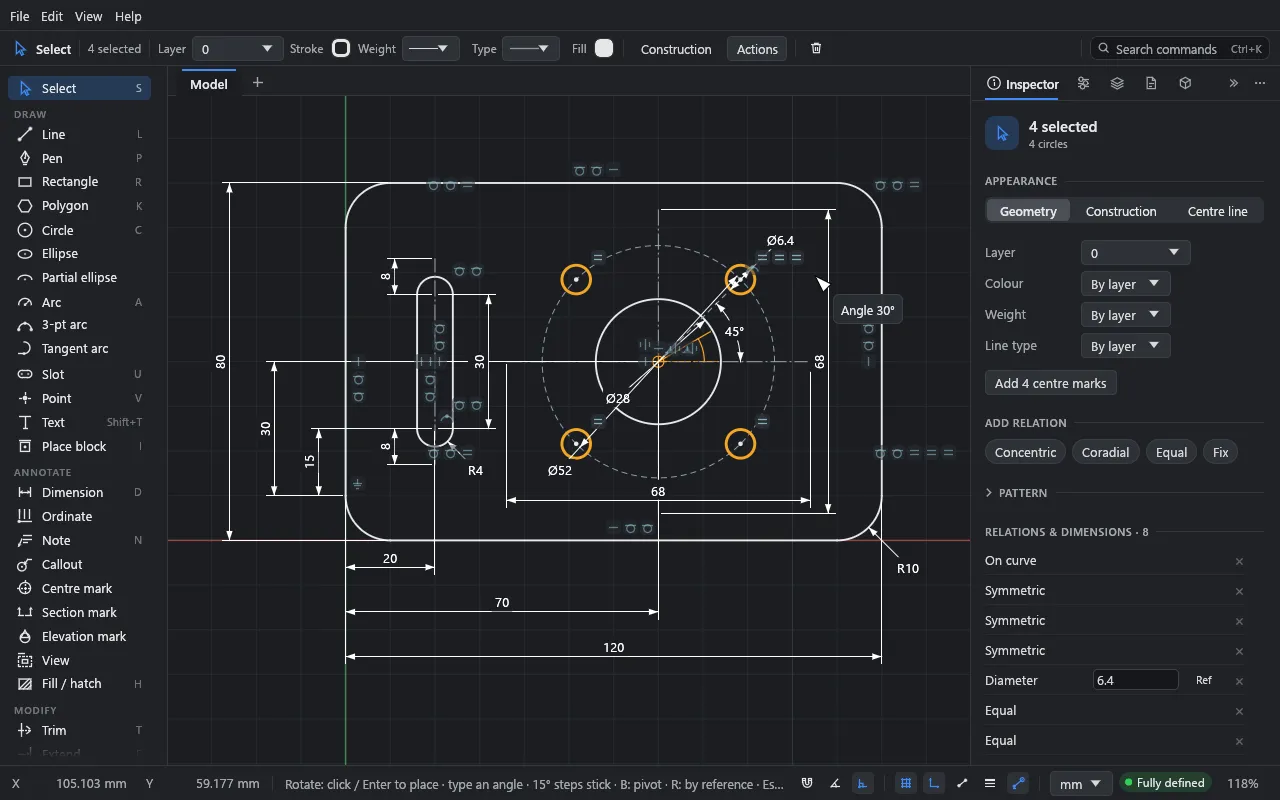
Press B to pick a different pivot; it snaps to points and the grid. Esc or a right-click cancels. While turning, snapping onto a point gives the exact angle to it.
Rotate by reference
To turn an edge onto a line, as AutoCAD’s Rotate → Reference does:
- Pick the geometry and press R.
- Press B and click the pivot, for example the corner the edge starts from.
- Press R again and click the reference: the edge’s other end, or any point along it.
- Move to the target line and click when the pointer snaps onto it. The edge turns to meet it.
A typed angle turns that far from the reference.
Quarter turns are exact. A turn by another angle removes horizontal and vertical relations inside the selection, and Drift says so. Geometry held in place by its relations (like the plate’s holes) can’t be turned. Without a selection, R is the Rectangle tool.
Scale with the transform handles
Pick two or more curves (or a picked area) with the Select tool. A box with handles appears round them.
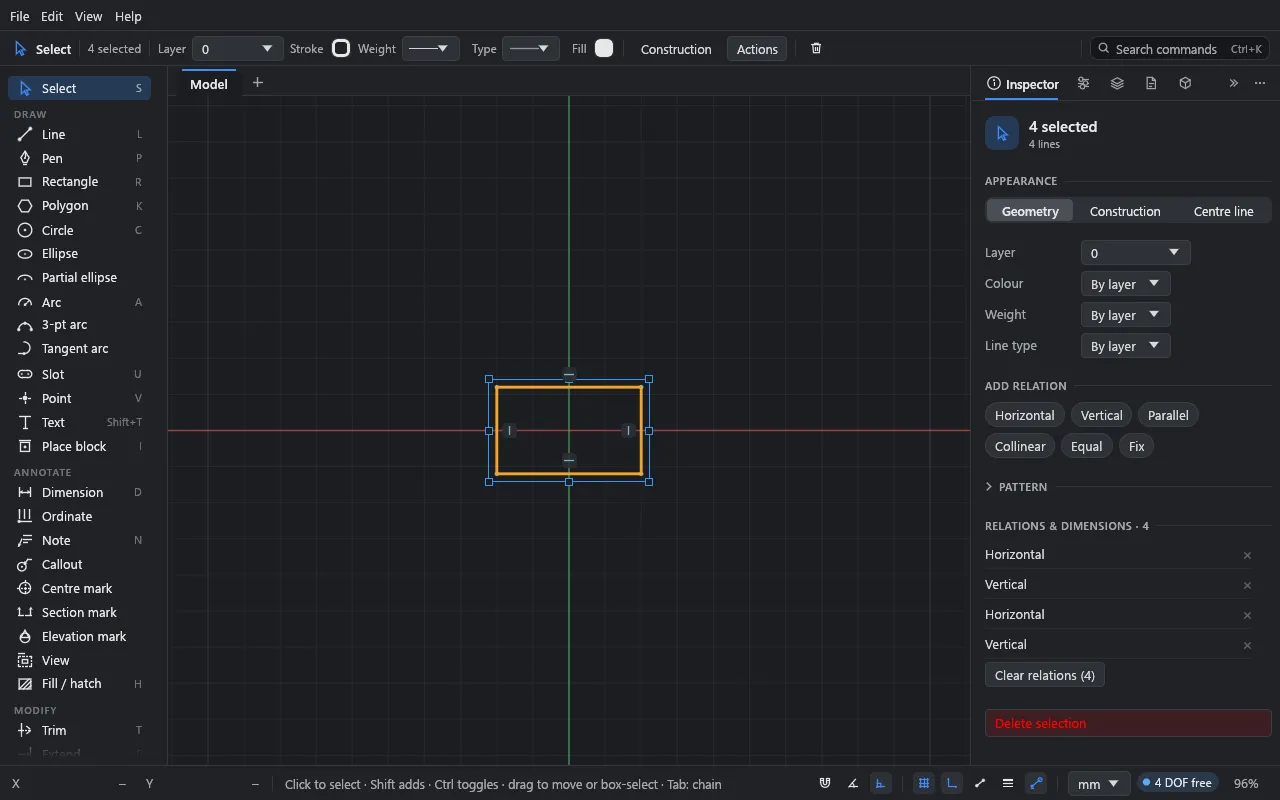
| Drag | To |
|---|---|
| A corner handle | Scale. |
| A side handle | Stretch in one direction. |
| Just outside a corner | Turn the selection about the box’s middle. |
While dragging:
- Shift keeps the shape (scales evenly).
- Ctrl scales about the middle instead of the opposite corner.
- Alt scales the dimensions too.
Without Alt, dimensions and relations hold: a dimensioned width stays as it is while a free height stretches. With Alt, every driving length entirely inside the selection takes its new, scaled value. The width and height then step through round sizes, finer as you zoom in; turn that off with Edit → Preferences… → Drawing aids → Round sizes when scaling with dimensions (Alt). Each scale is one undo step.
Trim, extend and split
- Trim (T): click a piece of a curve to remove it, up to the curves that cross it. Or drag across several pieces: the drag leaves a trail and trims everything it crosses.
- Extend (E): click near the end of a line or arc to lengthen it to the next curve.
- Split (in the tool palette; no key): click a curve where it should be cut in two. A circle or ellipse becomes two halves.
These work on lines, arcs, circles, ellipses and pen curves. With Auto relations on, the pieces stay related (a split line’s parts stay collinear; trimmed ends stay on the cutting curve).
Fillet and chamfer
-
Draw a rectangle (R and two clicks).
-
Press F for the Fillet tool.
-
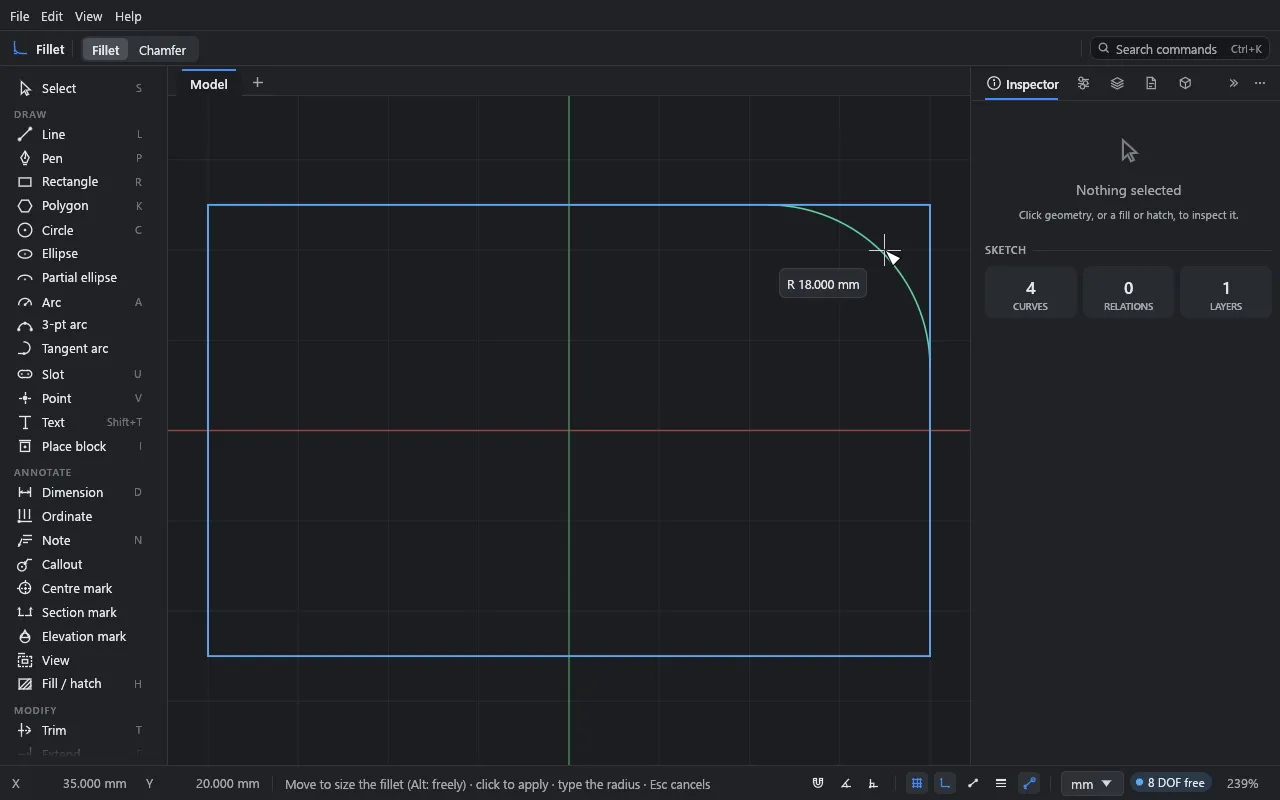
Click a corner. Move the pointer inwards: the fillet passes under the pointer, sized in round steps (hold Alt for any size).
-
Click to apply it. Or type a radius and press Enter.
A second click without moving reuses the last size. Esc or a right-click cancels.
Press F again for the Chamfer tool. Type its distance, and Tab for a second distance.
A fillet or chamfer takes the look of the corner’s lines: round a corner of construction lines and the arc is construction too.
A fillet or chamfer that’s already there can be resized: click it with the same tool, or drag a fillet’s arc with the Select tool. Its lines keep their directions. To put the sharp corner back, right-click it and choose Remove fillet or Remove chamfer.
Offset and mirror
- Offset (O): click a curve. Its whole connected chain is picked. Click the side to offset to, or type the distance and press Enter. Corners rejoin. Offset lines stay parallel to the original, at a dimensioned distance.
- Mirror (M): pick the geometry first with Select, press M, and click the line to mirror about. The copies are held symmetric to the originals.
Patterns
Pick geometry, then open Pattern in the Inspector:
- Linear: a Count and a spacing (Spacing X, Y), then Make linear pattern.
- Circular: a Count, an Angle and a centre (Centre X, Y), then Make circular pattern. 360° spreads the copies evenly round the circle.
Copies keep the relations within the selection. The fields take expressions.
Groups
- Ctrl+G groups the selection; Ctrl+Shift+G ungroups. (Also in Edit and the top bar’s Actions menu.)
- Clicking any member picks the whole group, and moves and turns take it together.
- Double-click a group to edit inside it: members pick one by one, and anything you draw joins the group. Esc, or a click outside, leaves it.
- The Inspector shows a picked group’s name (rename it there), member count, Edit group and Ungroup.
Delete and undo
- Delete (or Backspace) deletes the selection. A fill goes with its boundary.
- Ctrl+Z undoes, Ctrl+Y or Ctrl+Shift+Z redoes. The Edit menu names what it will undo.
What you learned
- Click, Shift, Ctrl and box selection; filters; Tab for chains.
- G moves and R rotates, with X / Y locks, typed values and B for the base point or pivot. R again rotates by reference.
- The transform box scales and stretches; Alt scales the dimensions with it.
- T, E, F, O and M trim, extend, fillet, offset and mirror; Split and patterns are in the palette and Inspector.
Next
Temporary dimensions: set distances between walls the way Revit does.