
Your first sketch
What you’ll make: an 80 × 50 mm plate with a 20 mm hole in the middle, and a 50 mm line above it. Along the way you’ll use snapping, typed sizes, Alt for free placement and the X / Y axis locks.
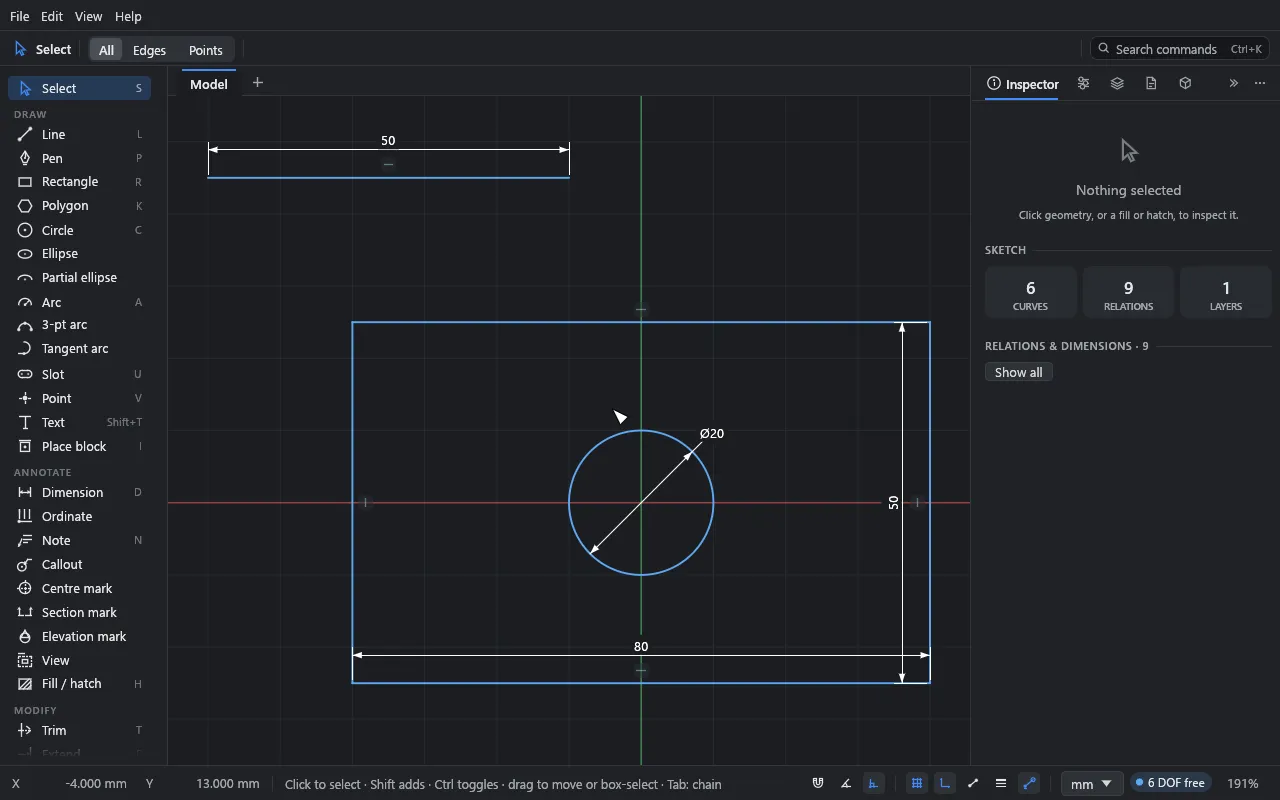
Time: about 10 minutes.
Before you start
Start a new sketch (Ctrl+N, or New sketch on the start panel). Check that Auto relations is on: its switch in the status bar at the bottom (a corner with a square mark) is highlighted. It is by default; Shift+Alt+R turns it off and on.
The sketch is in millimetres unless you’ve changed it. The status bar’s units menu (it shows mm) switches units at any time without moving anything; see Units.
Draw a line, locked to the X axis
-
Press L (or click Line in the tool palette).
-
Click on the canvas to place the start point, somewhere above and left of the origin.
-
Move the pointer to the right. A preview follows it, and a label beside the pointer shows the length (L) and angle (A).
-
Press X. The line locks to the X axis: it stays level wherever the pointer goes, and the hint in the status bar says so. (Y locks it upright. Press the same key again to unlock.)
-
Type
50. The digits go straight into the Length field beside the pointer; you don’t need to click anything first.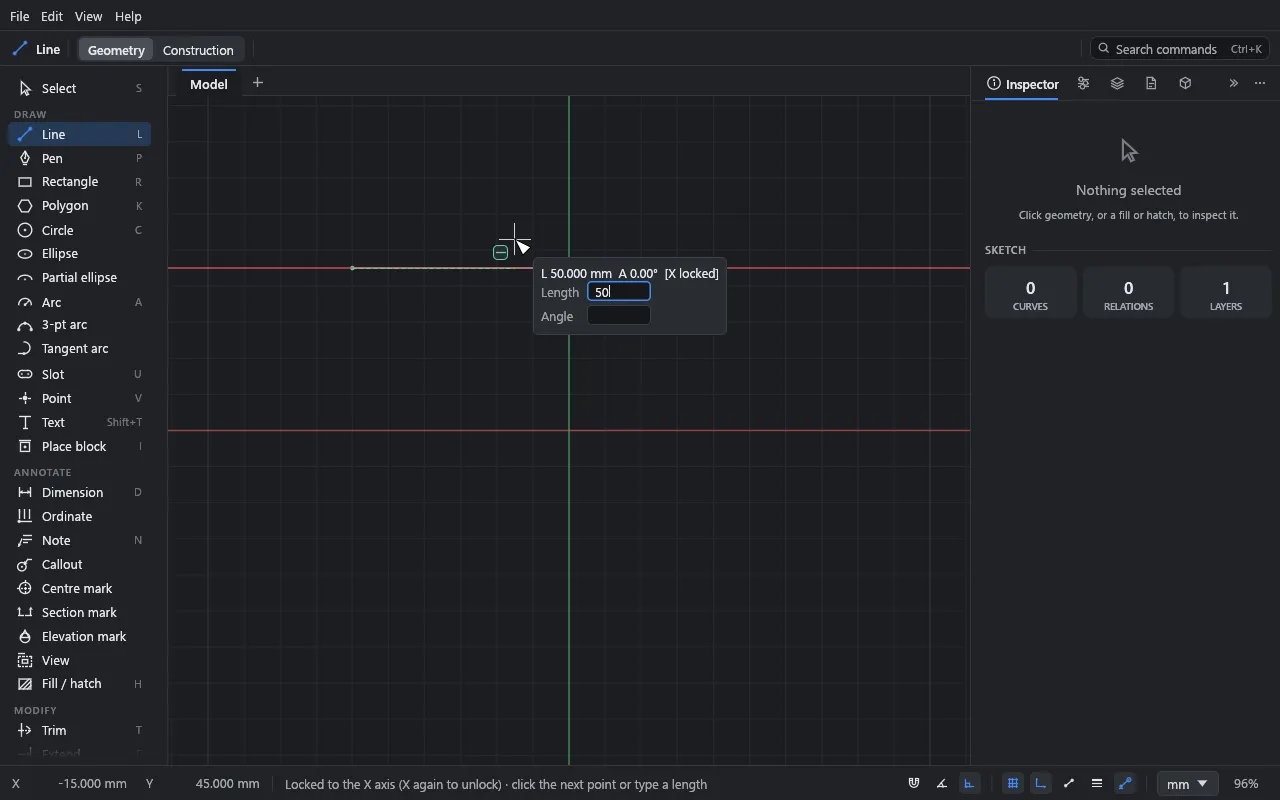
-
Press Enter. The line is placed, exactly 50 mm long, in the direction of the pointer.
-
The Line tool carries on from the end you just placed, so you can draw a chain. Press Esc to stop the chain. (Enter or a right-click also finishes it.)
The line gets a dimension (the 50 above it) and a horizontal relation (the small — symbol). Typed sizes become dimensions, and the axis lock adds the matching horizontal or vertical relation. That’s what Auto relations does. With it off, the same steps draw a plain line with nothing attached.
Typing values. Typing starts as soon as you press a digit,
.,-,(or=. Tab moves to the next field (for a line: Angle), Backspace deletes, Enter applies and Esc stops typing. Units work anywhere:2in,25mm,1'-6",30deg. A bare number is in the sketch’s display unit.
Draw a rectangle with typed sizes
-
Press R for the Rectangle tool.
-
Click where the first corner goes. Click near (−40, −25): the pointer’s coordinates are in the status bar’s bottom left. Don’t worry about being exact.
-
Move the pointer up and to the right. The direction you point is the direction the rectangle grows.
-
Type
80, press Tab, and type50. The preview shows the rectangle at that size.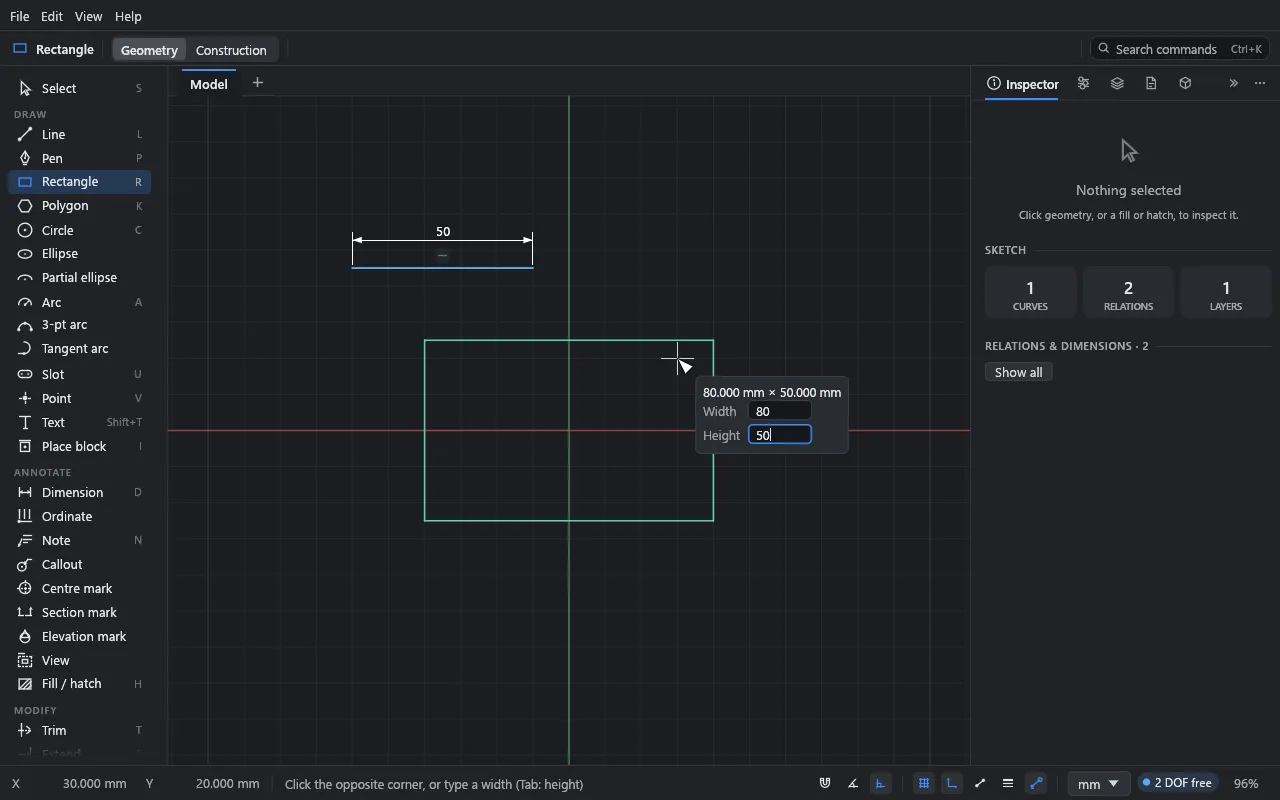
-
Press Enter.
Typing works for the first point too: before the first click, type the X coordinate, Tab, the Y coordinate, and Enter.
The rectangle comes with horizontal and vertical relations on its sides, and dimensions for the width and height you typed. It’s still blue: nothing says where it is yet. You’ll pin it down in the next tutorial.
Draw a circle on the origin
- Press C for the Circle tool.
- Move the pointer to the origin, where the red and green axes cross. A ring appears when the pointer snaps to it. Click.
- Move outwards, type
20(the diameter) and press Enter. - Press Esc to go back to the Select tool.
Pressing C again, while the Circle tool is active, switches to the Ellipse tool, and again to Partial ellipse. A works the same way for arcs (centre, 3-point, tangent), F for fillet and chamfer, and U for the three kinds of slot.
Snapping and inference
As you draw, the pointer snaps to what’s near it, and a marker shows what it found:
- End points, centres, midpoints and quadrants of curves.
- A point along a curve (nearest-on-curve).
- The origin.
- The grid, if Snap to grid is on (Shift+G, or the status bar).
Snapping onto an existing point connects to it: the two curves share that point. Snapping onto a curve or a midpoint keeps the new point there with an On curve or Midpoint relation (when Auto relations is on).
Inference lines help you line things up. Hover over an existing point for a moment, then move away: a dashed guide appears when the pointer is level with it or straight above or below it. These guides add no relation.
Lines drawn nearly horizontal or vertical snap straight and get the relation.
Angle snap, in the status bar next to the grid snap, makes lines turn in steps: every 1°, 5°, 15° or 45°.
Place freely with Alt
Hold Alt while you click to place a point exactly where the pointer is, with no snapping. Use it when a snap keeps pulling you onto geometry you don’t want to touch.
Finish
Press Shift+F to fit the drawing in the window. Save it with Ctrl+S; you’ll use it in the next tutorial.
What you learned
- L, R and C pick the Line, Rectangle and Circle tools; pressing a key again cycles through related tools.
- Type sizes while drawing: Tab moves between fields, Enter applies.
- X and Y lock a line to an axis.
- Snapping connects new geometry to old; Alt turns it off for one click.
- With Auto relations on, typed sizes become dimensions and straight lines get horizontal and vertical relations.
Next
Constraints and dimensions: make the rectangle fully defined, and see what happens when you ask for too much.