
Constraints and dimensions
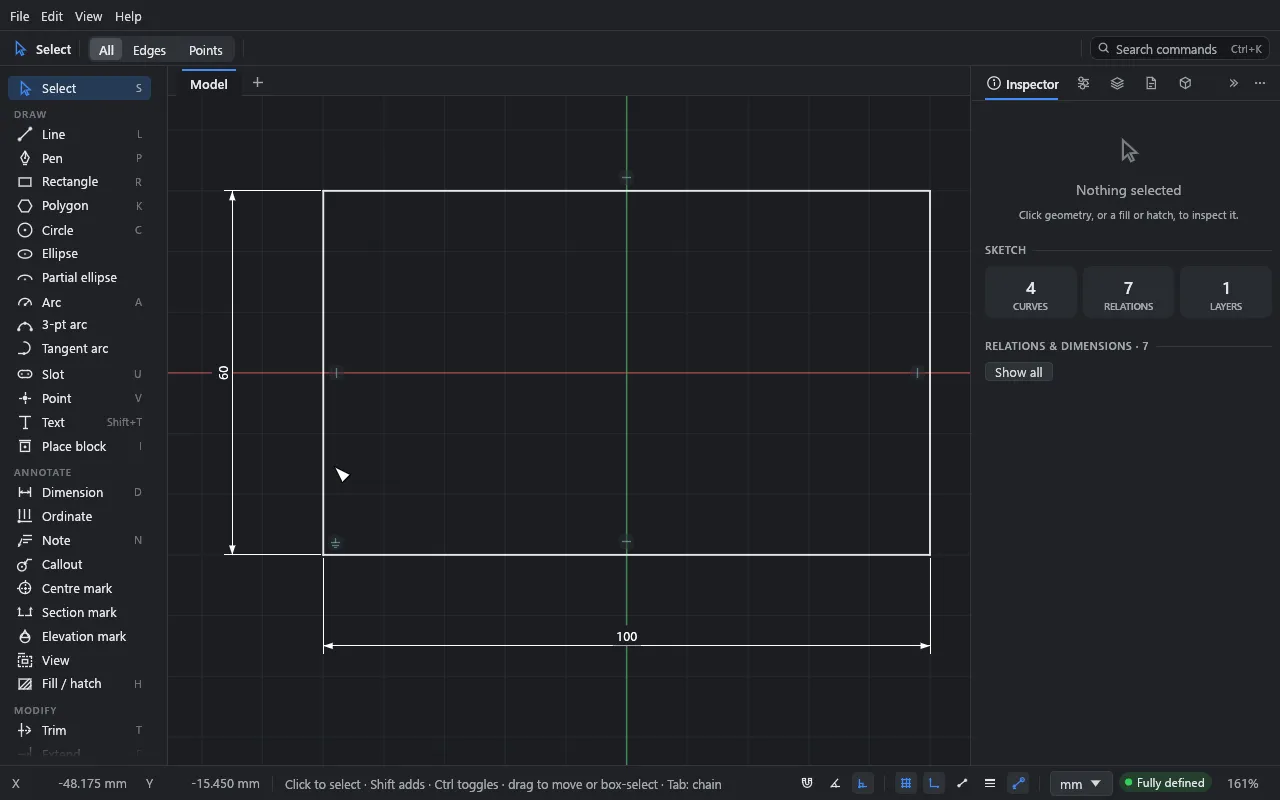
What you’ll make: a 100 × 60 mm rectangle that is fully defined: it can’t move or stretch unless you change a dimension. You’ll then ask for one dimension too many and see how Drift handles it.
Time: about 15 minutes.
The idea
A sketch in Drift is held in shape by two kinds of constraint:
- Relations say how geometry relates: horizontal, vertical, parallel, perpendicular, tangent, equal, coincident, concentric, collinear, coradial, midpoint, on curve, symmetric, and fix.
- Dimensions give sizes: lengths, distances, radii, diameters and angles.
Each point or curve can move in a number of ways, its degrees of freedom (DOF). Each constraint takes some away. When none are left, the sketch is fully defined. Drift solves the constraints continuously: drag something and everything connected follows, keeping every constraint true. Arcs you aren’t dragging by an end keep their size where they can, so dragging a fillet’s centre carries its lines and any concentric round along. A drag that would turn an arc inside out, or put a tangent curve on the other side of its line, stops short instead.
You don’t have to fully define a sketch. Under-defined geometry is fine for exploring; it just means some things can still move.
1. Draw a rectangle and read its status
- Start a new sketch (Ctrl+N).
- Press R and click two opposite corners.
- Press Esc.
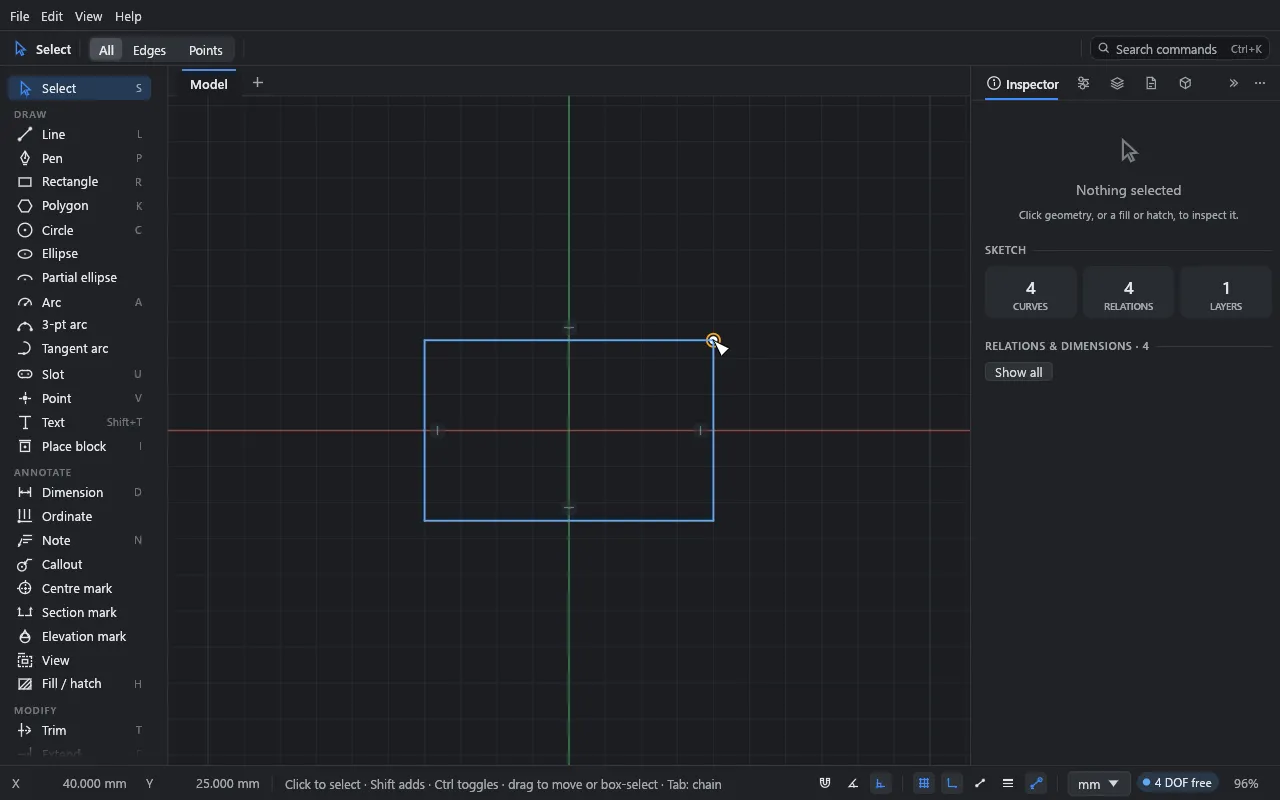
The rectangle is blue (under-defined), and the status bar says 4 DOF free: it can move left-right and up-down, and stretch in width and height. The small symbols on its sides are its relations: — for horizontal and | for vertical. The Rectangle tool adds those for you.
Try dragging a corner with the Select tool. The rectangle stretches but stays rectangular. Ctrl+Z puts it back.
View → Free directions draws small arrows showing which way each point can still move.
2. Add dimensions with the Dimension tool
-
Press D for the Dimension tool.
-
Click the bottom side, a little away from its middle. (Clicking right at the middle of a line picks its midpoint instead; that’s useful later.)
-
Move the pointer below the rectangle and click to place the label.
-
A value field opens on the canvas with the current length selected. Type
100and press Enter. The rectangle stretches to 100 mm.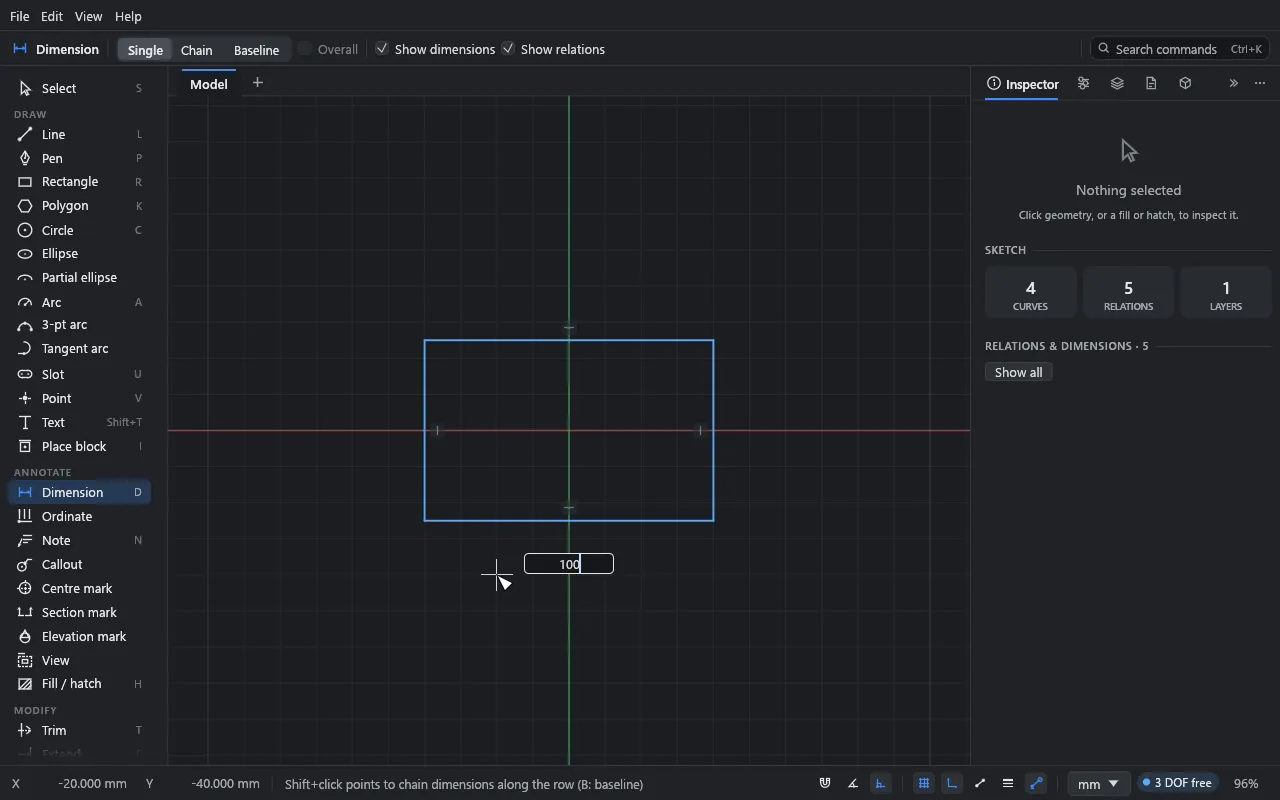
-
Click the left side, click to the left of it to place the label, type
60and press Enter. -
Press Esc.
The status bar now says 2 DOF free: the size is set, but the rectangle can still slide around.
The Dimension tool works out the kind of dimension from what you click:
| Click | You get |
|---|---|
| A line | Its length. |
| A circle | Its diameter. |
| An arc | Its radius. |
| Two points | The distance between them: aligned, horizontal or vertical, depending on where you place the label. |
| Two lines | The angle between them, or the distance between them if they run alongside each other (within 1° of parallel). |
| A point and a line | The distance from the point to the line. |
A point can also be a line’s midpoint: click near the middle of the line.
After you click the geometry, you can click other geometry to change the dimension before you place it.
3. Fix a corner
-
Press Esc to go back to the Select tool.
-
Click the lower-left corner point.
-
In the Inspector, under Add relation, click Fix.
You can also right-click the point and choose Add relation → Fix, or use the relations pie (below).
The rectangle turns white and the status bar says Fully defined. A ground symbol marks the fixed point.
Adding relations
There are three ways to add a relation to what you’ve picked. Each offers only the relations that fit the selection (for two lines: parallel, perpendicular, equal, collinear and so on).
- The Inspector’s Add relation buttons.
- The right-click menu’s Add relation submenu.
- The relations pie. Hold Q, flick the pointer towards a relation and let go. Or tap Q and click one. Each relation always sits in the same place (horizontal to the right, vertical up, parallel and tangent upper right, and so on), so you learn the flicks. While the pie is open you can also press a relation’s letter, shown on it: Q then H for horizontal, V vertical, L parallel, P perpendicular, E equal, F fix, M midpoint, C concentric, R coradial, T tangent, S symmetric, I coincident, N collinear, O on curve.
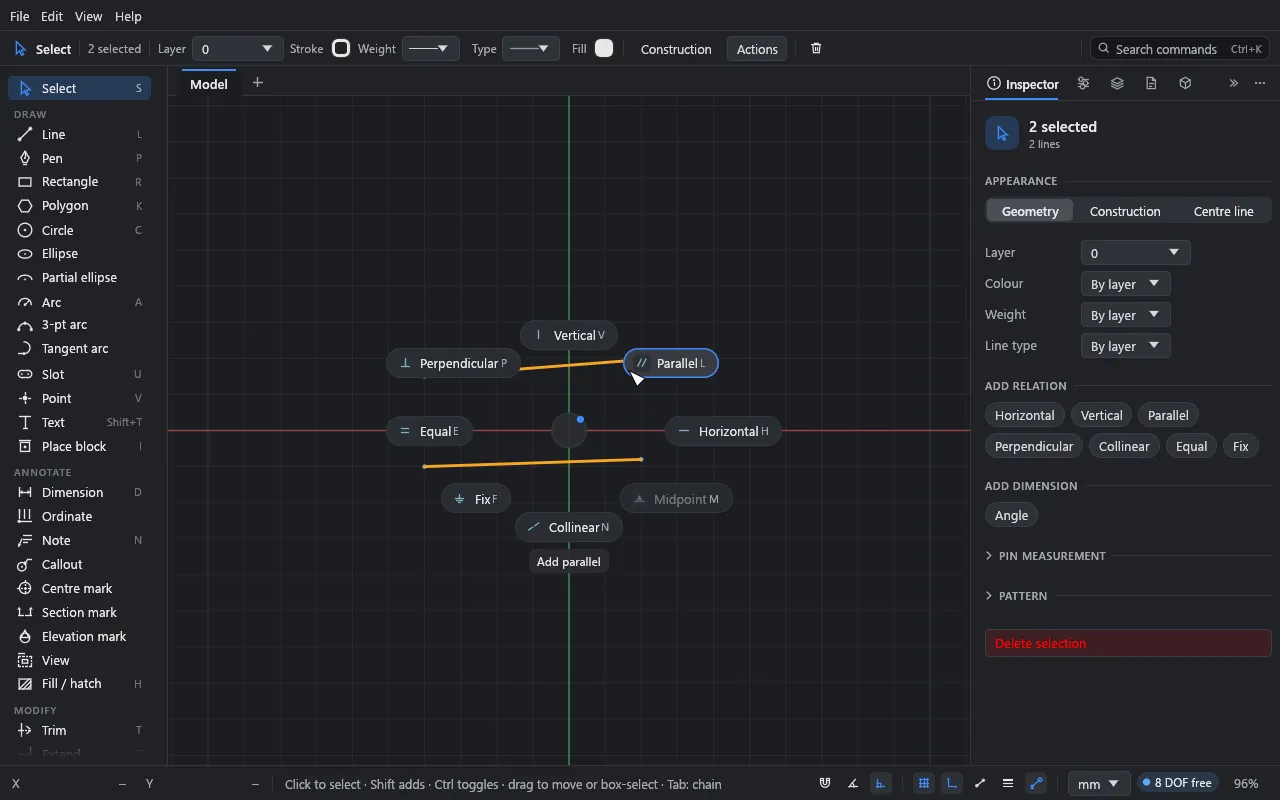
In the pie, a relation that’s already on the selection is lit, and choosing it takes it off. Ones that don’t fit are dimmed. One that would over-define the sketch says so before you choose it.
To pick two things, click the first and Shift+click the second.
Automatic relations
With Auto relations on (its switch in the status bar, or Shift+Alt+R), Drift adds relations as you draw: horizontal and vertical for straight lines, coincident where you snap to a point, on curve where you snap to a curve, midpoint where you snap to a midpoint, tangent for tangent arcs, and so on. The modify tools (trim, fillet, offset, mirror…) add theirs too.
Turn it off to draw plain geometry with nothing attached. Relations and dimensions you add yourself are never affected.
Edit a dimension
- Change its value: double-click the label and type. Any expression works:
60 + 15,2in, or a variable name (see Parameters). - Move its label: drag it.
- Pick it: click the label. The Inspector shows its text, tolerance and display settings (see Annotation). Delete removes it.
- Sizes in the Inspector: a picked line’s Length, or a circle’s Radius and Diameter, can be typed into. If a dimension drives that size, the dimension changes. If not, one is added (with Auto relations off, the size just changes).
Alt+D hides or shows all dimensions; Alt+R does the same for relation symbols.
4. Ask for one dimension too many
The rectangle’s top side must be 100 mm, because the bottom is 100 mm and the sides are vertical. Dimension it anyway:
- Press D and click the top side, then place the label above.
Drift doesn’t add a dimension that would over-define the sketch. Instead it asks:
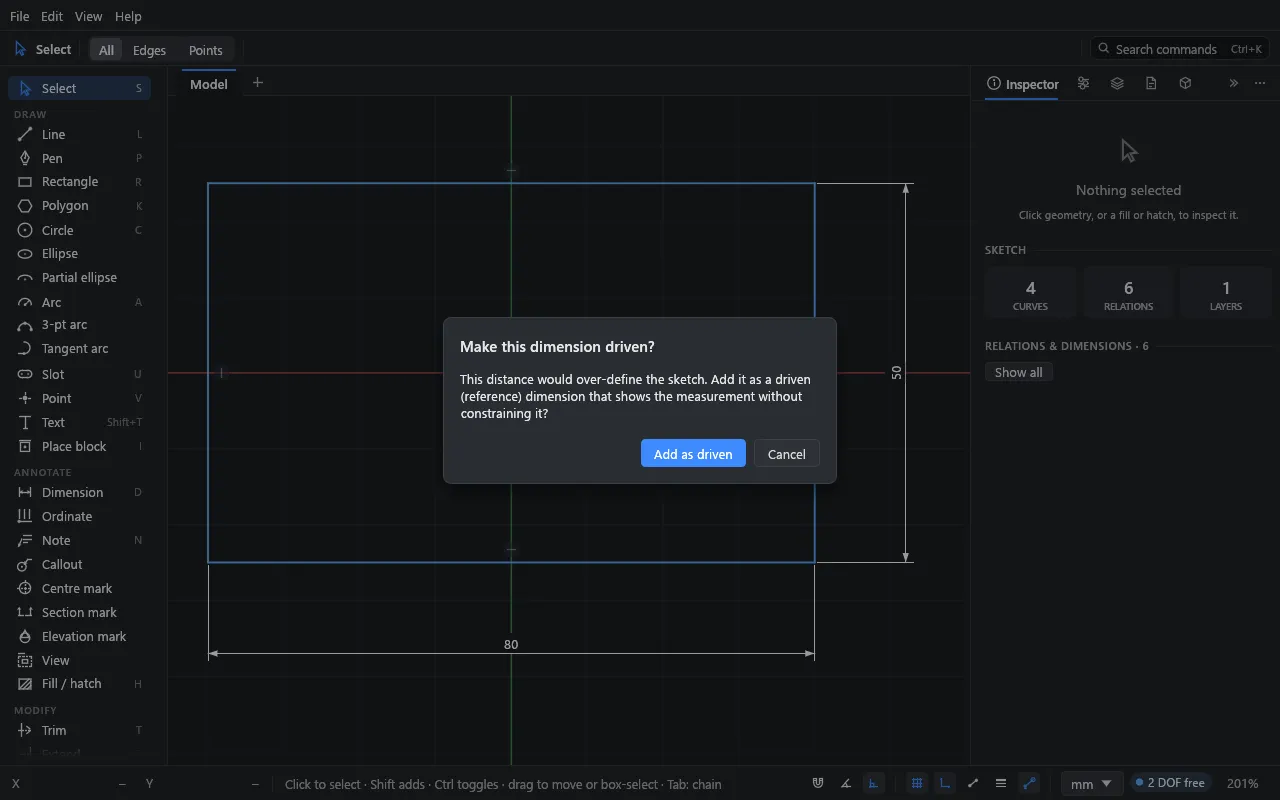
- Click Add as driven.
A driven (reference) dimension shows a measurement but doesn’t constrain anything. It’s
grey with its value in parentheses, like (100), and it updates as the geometry changes.
To switch a dimension between driving and driven, pick it and use the Driven (reference)
checkbox in the Inspector. Switching back to driving is checked like a new dimension.
When a sketch is over-defined
Drift refuses a relation or dimension that conflicts with others, that adds nothing new, or that would collapse geometry (a line both horizontal and vertical), and says why in a message at the bottom of the canvas.
If a sketch does end up conflicting (for example after an import or an edit elsewhere), the curves involved turn red and the status bar says N conflicting. To fix it:
- Remove a relation: click its symbol on the canvas to pick it, and press Delete. Or pick the geometry and use the × beside the relation in the Inspector’s list.
- Make a dimension driven with the Driven (reference) checkbox.
- Clear everything on the selection: pick the geometry and use Clear relations or Clear dimensions (in the Inspector, the right-click menu or the command palette). That removes every relation or dimension on those curves and their points, including ones that tie them to geometry you didn’t pick. Shared corners stay joined. It’s one undo step.
Chains, baselines and overall dimensions
For a row of dimensions, set the Dimension tool’s mode in the top bar:
- Single (default): one dimension at a time. After a horizontal or vertical dimension, Shift+click more points to continue the row.
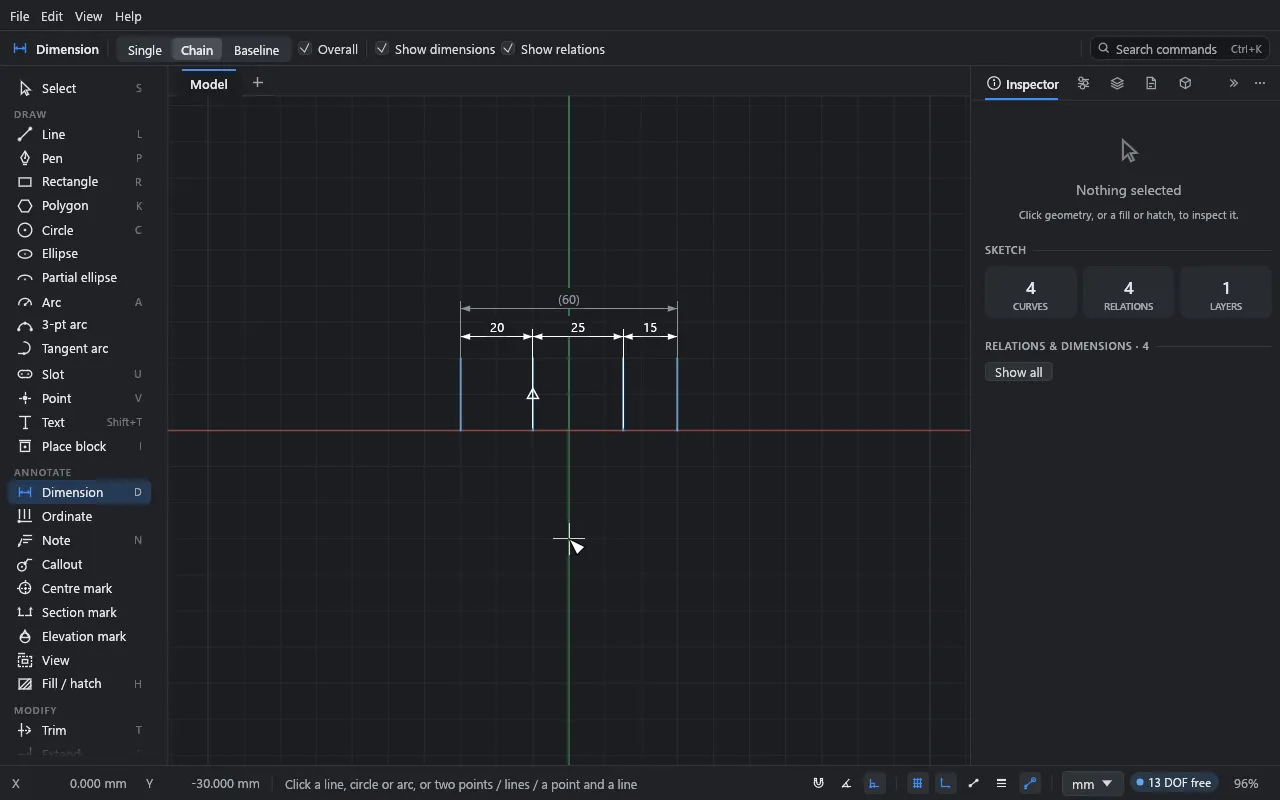
- Chain: after the first dimension, each point or line you click adds the next dimension along the row. A line counts from its nearer end; walls can be clicked anywhere along them, and the chain runs from wall to wall.
- Baseline: each dimension is measured from the same base, each a step further out.
- Overall (with Chain): when the row ends, an overall dimension is added outside it, as a reference.
An empty click, Enter or Esc ends the row. B switches between chain and baseline while you go. Dimensions in a row that would over-define the sketch become driven automatically.
Keeping dimensions tidy
Drag a dimension’s number to move it. Near another dimension that measures the same way (both horizontal, say), it snaps level with that one’s line, and a dashed guide shows which. Hold Ctrl to place it freely.
To line up several at once, Shift+click them, then right-click and choose:
- Align dimensions: the parallel ones go on the first one’s line.
- Space dimensions evenly: three or more stacked ones are spaced evenly between the outermost two.
Both are in the command palette too. Dimensions measuring another way are left as they are.
What you learned
- Relations and dimensions take away degrees of freedom. The status bar counts what’s left, and colours show it: blue (free), white or black (fully defined), red (conflicting).
- D dimensions whatever you click; where you place the label decides the kind.
- Q opens the relations pie; the Inspector and right-click menu offer the same.
- An extra dimension becomes driven instead of over-defining the sketch.
Next
Parameters: drive dimensions from named variables, and switch between variants.